


.svg)
.svg)


Get Business Email
No domain name required

Forwarding emails is a core functionality that allows you to pass along messages to others easily. Gmail, which has over 1.8 billion active users and receives over 300 billion weekly emails, provides simple and intuitive tools for forwarding messages. Thus, forwarding an email in Gmail with just a few clicks is essential. You can forward a single message or even bundle multiple emails into one forward. It is as simple as deleting bulk emails in Gmail.
Gmail also allows you to add a personal message when forwarding to provide context easily. Many email users customize their forwarding settings to append a signature or disclaimer automatically. With such heavy email volume these days, being able to quickly and easily forward messages in Gmail is invaluable.
In this comprehensive guide, we'll provide step-by-step instructions on how to forward an email in Gmail. Whether forwarding to loop someone into a conversation, sharing information, or getting input from others, we have got you covered!
What Do We Mean by Email Forwarding?
Email forwarding is a feature that allows you to redirect emails from one email account to another automatically. When you set up email forwarding, any new messages that arrive in your original email inbox will be automatically sent to a specified forwarding email address.
This can be useful for consolidating multiple email accounts into one centralized inbox or ensuring that important messages don't get missed by having them sent to an account that you check more frequently.
In addition to forwarding all emails, many email services offer the ability to create rules or filters to selectively forward only certain messages based on criteria like the sender, subject line, or content of the email. This provides more granular control over which emails get forwarded and can help prevent your forwarding inbox from becoming cluttered with irrelevant messages.
5 Steps on How to Forward an Email in Gmail
Gmail makes the process of forwarding emails incredibly straightforward, with just a few clicks required to pass along a message to another recipient. Here is a detailed, step-by-step guide on how to forward an email in Gmail:
Step 1: Login Into Your Gmail Account.
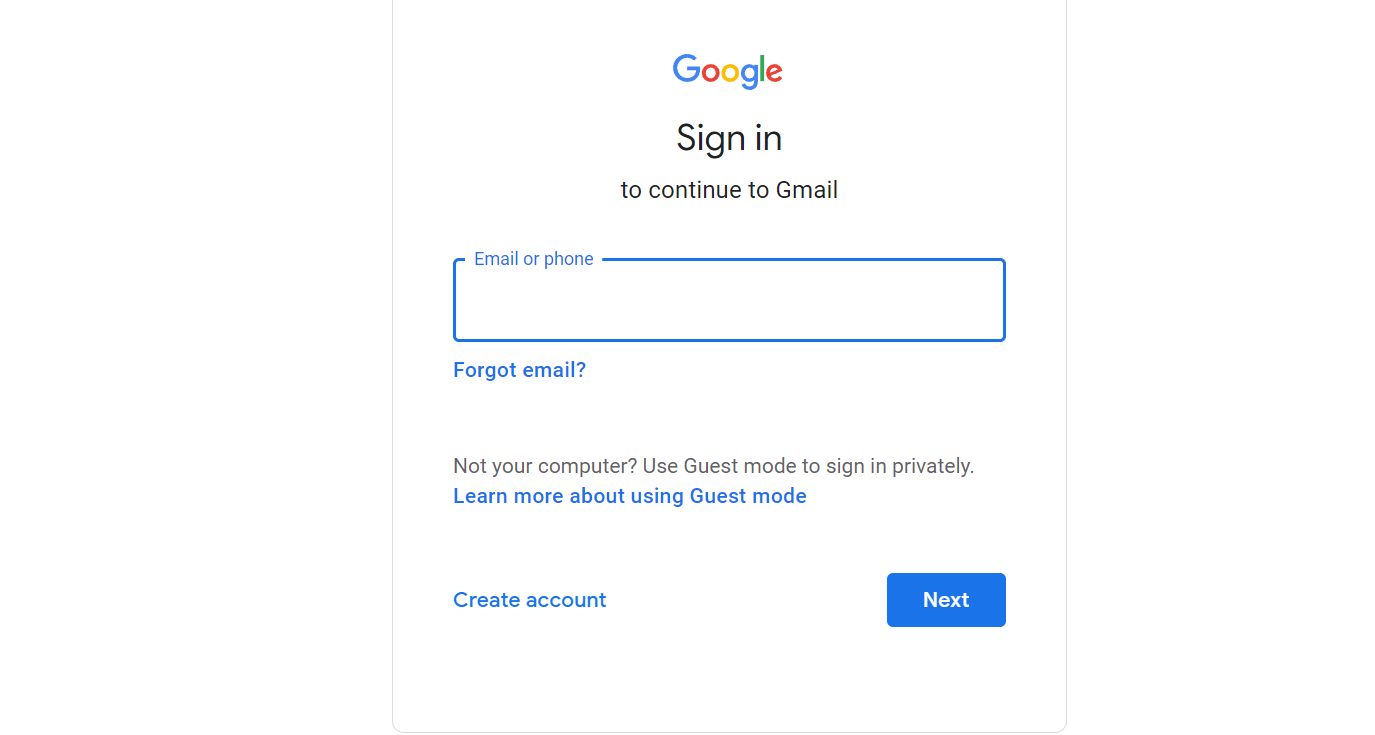
Begin by navigating to Gmail in your web browser. Enter your email address and password to access your inbox. If you have two-factor authentication enabled, follow the prompts to complete the sign-in process.
Step 2: Select the Email to Forward.
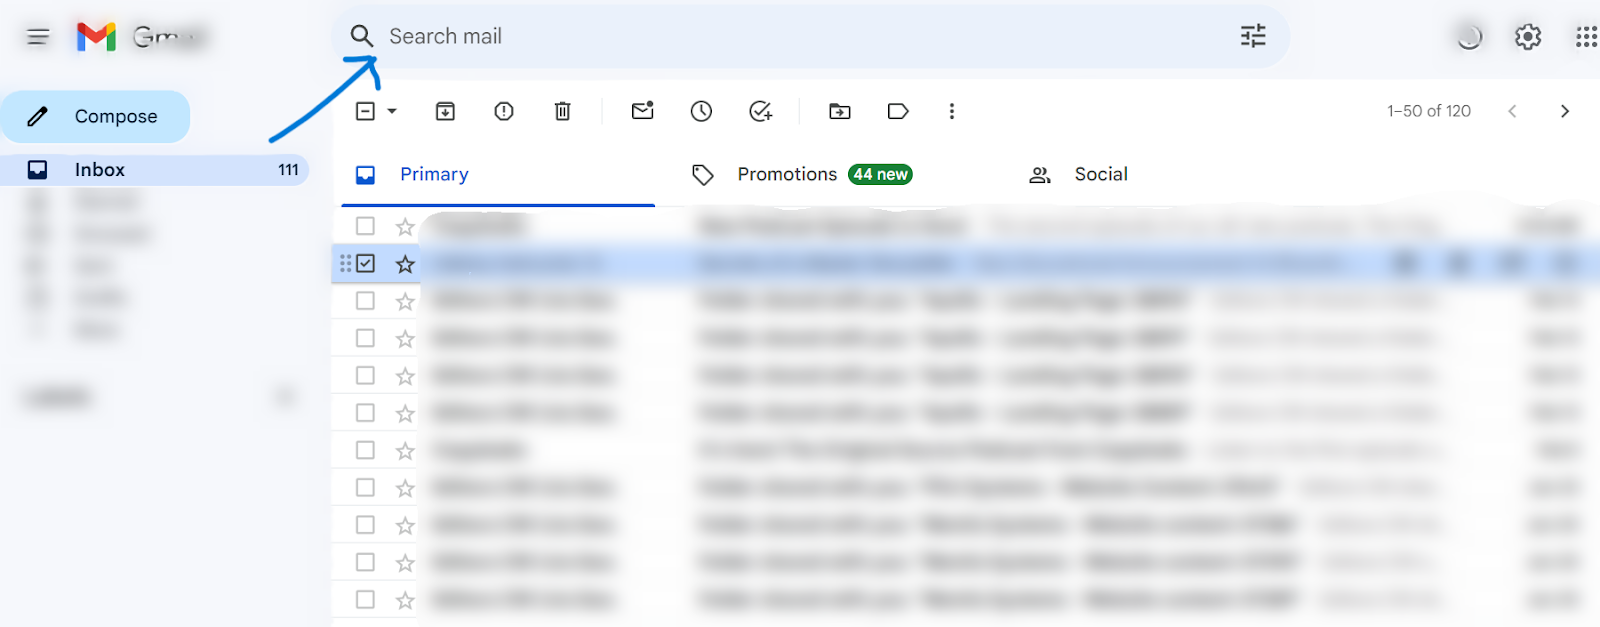
Once logged in, browse your inbox for the email you wish to forward. You can use the search bar at the top to find specific emails by entering keywords, sender names, or dates. Click on the email to open it.
Step 3: Forward the Email.
- Open the email by clicking on it. Inside, look for the three dots (More options) menu near the top-right corner of the email window, next to the reply arrow.
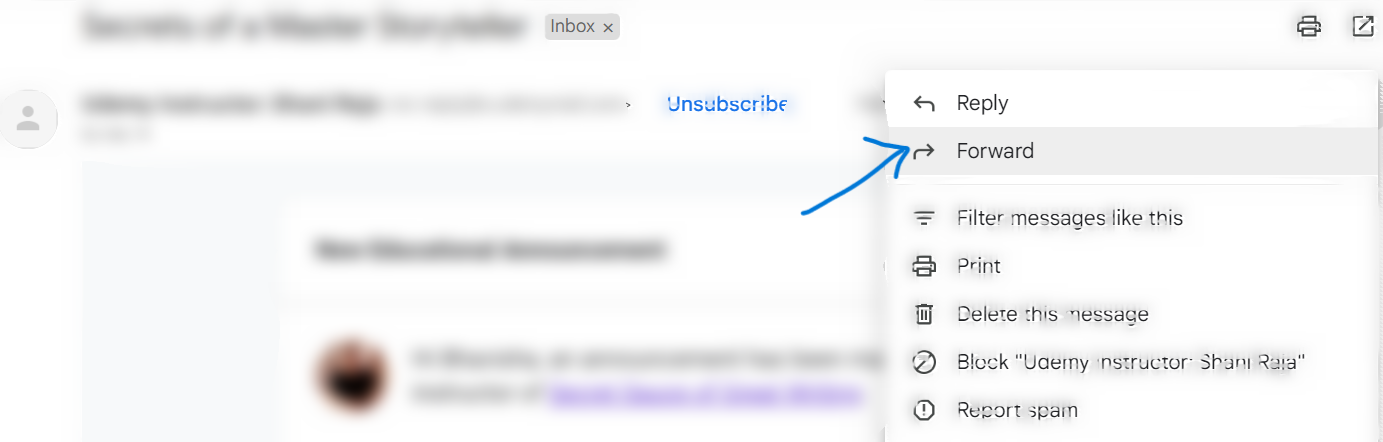
- Click on the three dots to open a dropdown menu, then select "Forward."
- A forwarding section will appear at the bottom of the email content. Here, you'll type in the email address of the recipient(s) you wish to forward the email to. If forwarding to multiple recipients, separate each email address with a comma.
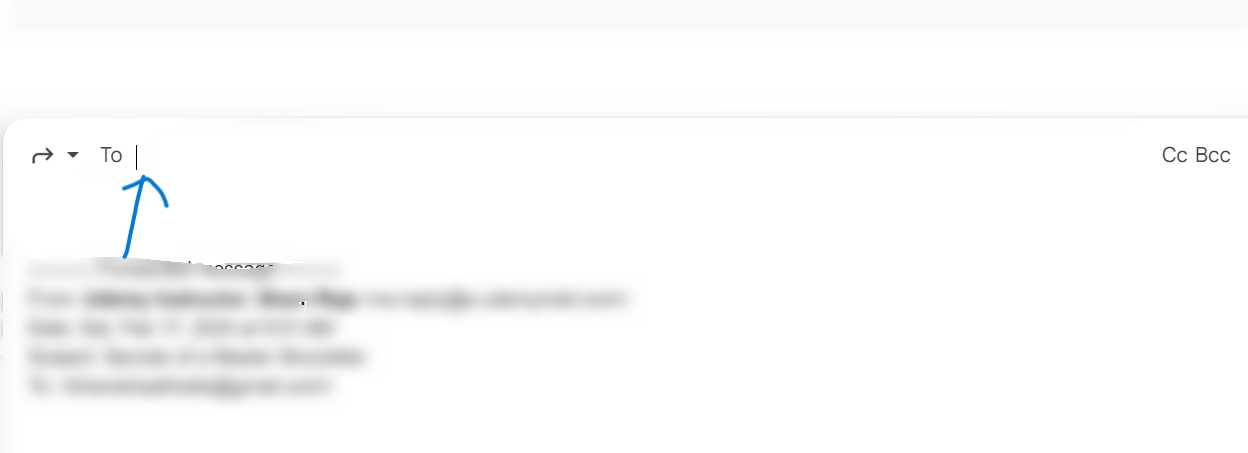
Step 4: Add a Personal Message (Optional).

Below the "To" field, you'll find the main body of the email, where the original message you're forwarding will be displayed. This is also the area where you can add your message or comments to provide context or additional information to the recipient(s), like sending a reminder to your client regarding payment or anything else. Click in the body and start typing to add your message.
Step 5: Review and Send the Forwarded Email.
Before sending the forwarded email,
- Take a moment to review the information in the composition window.
- Double-check that you've entered the correct recipient email addresses and that your message (if you included one) is clear and concise.
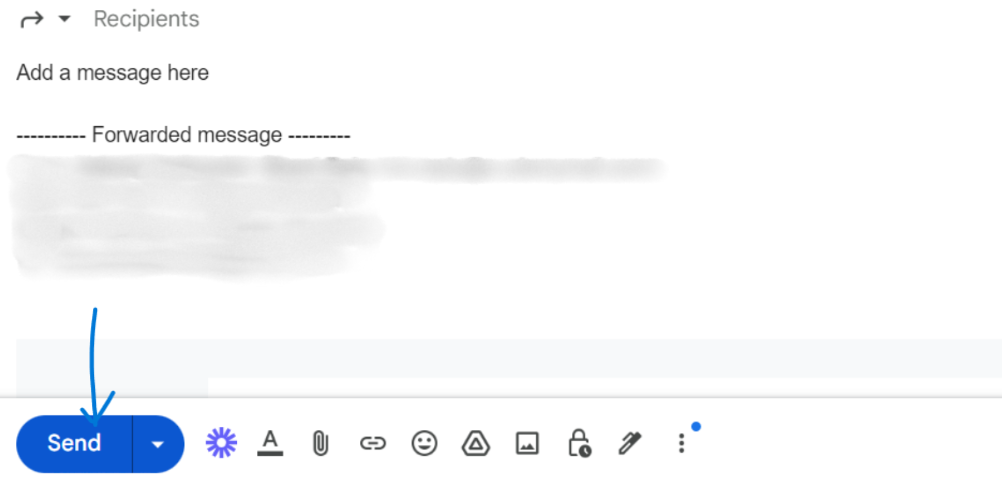
If everything looks good, click the "Send" button, which is typically located in the bottom-left corner of the composition window.
By following these step-by-step instructions and utilizing the various forwarding options available in Gmail, you can efficiently and effectively forward emails to keep colleagues, friends, and family members informed and engaged in important conversations and communications.
Advanced Email Forwarding Features in Gmail
Gmail offers several advanced features that provide more granular control and flexibility when it comes to forwarding emails. These features can help you streamline your email management, ensure important messages don't get overlooked, and collaborate more effectively with others. Here are some of the advanced email forwarding features in Gmail and step-by-step instructions on how to use them:
1. Automatic Forwarding
Automatic forwarding allows you to set up a rule that automatically forwards all incoming emails to a specified email address. This can be useful if you want to consolidate multiple email accounts or ensure that you never miss important messages.
Steps
- Click on the Settings option, which is represented by a Gear icon in Gmail.
- Scroll down to find the Forwarding and POP/IMAP sections and select the Add a Forwarding Address option.
- Enter the email address to which you want to forward your Gmail messages, then click Next and follow the verification steps.
- Once verified, select the option to Forward a copy of incoming mail and choose the email address you just added.
- Optionally, you can keep Gmail's copy of the forwarded messages or delete them after forwarding.
- Click the Save Changes option after scrolling down to the bottom of the page.
2. Forwarding Filters
Forwarding filters allow you to automatically forward only specific emails that match certain criteria, such as emails from particular senders, with specific words in the subject line, or containing certain content. This can help prevent your forwarding inbox from becoming cluttered with irrelevant messages.
Steps
- Open Gmail and click on the search bar to access the advanced search options.
- Enter the criteria for the emails you want to forward (e.g., "from:sender@example.com" to forward emails from a specific sender).
- Click on the "Create filter" button at the bottom of the search window.
- In the filter options, check the box next to "Forward it to" and enter the email address you want to forward matching messages to.
- Click "Create filter" to save the forwarding filter.
3. Forwarding Entire Conversations
Instead of forwarding individual emails, you can choose to forward an entire email conversation or thread. This can provide more context and ensure that the recipient receives all the relevant messages in a single forwarded email.
Steps
- Open the email conversation you want to forward.
- Click on the three-dot menu icon in the top-right corner of the conversation and select "Forward all."
- Enter the recipient's email address in the "To" field in the new composition window.
- Optionally, add a personal message or comments in the body of the email.
- Click "Send" to forward the entire email conversation.
4. Forwarding as Attachments
Instead of forwarding an email inline, you can choose to forward it as an attachment. This can be useful if you want to keep the original formatting and layout of the email intact or if you need to forward an email to someone who may not have a compatible email client.
Steps
- Open the email you want to forward.
- Click on the small down arrow next to the "Forward" button and select "Forward as Attachment."
- Enter the recipient's email address in the "To" field in the new composition window.
- Optionally, add a personal message or comments in the body of the email.
- Click "Send" to forward the email as an attachment.
By utilizing these advanced email forwarding features in Gmail, you can tailor your forwarding settings to your specific needs and preferences.
Whether you want to automatically forward all incoming emails, selectively forward based on specific criteria, forward entire conversations for context, or forward emails as attachments, Gmail provides the tools and flexibility to help you manage your email communications more effectively.
Common Gmail Forwarding Mistakes and Their Solutions
Forwarding emails in Gmail should be simple, but users often face common pitfalls that can disrupt communication and hinder productivity. Awareness of these challenges can help you forward emails more effectively, ensuring important information is shared accurately and efficiently.
1. Forgetting to Include Attachments
One of the biggest mistakes when forwarding emails is forgetting to include original attachments. Users sometimes forward just the email body, assuming attachments will be included automatically - but this is not always the case. Omitting attachments results in incomplete information being passed along, potentially delaying projects or causing confusion.
Solution:
Always double-check that all attachments are included before hitting "Send" on a forwarded email. If forwarding an email thread, you may need to manually attach files to ensure they are sent with the forwarded message.
2. Breaching Privacy and Confidentiality
Email forwarding can inadvertently share sensitive data without proper consent. Users may forward emails containing personal information, confidential business details, or private conversations, risking privacy violations and legal issues.
Solution:
Before forwarding, consider if you have permission to share the content. If unsure, seek the original sender's consent or remove sensitive details before forwarding.
3. Lacking Context
A common challenge is forwarding emails without providing additional context or explanation. Recipients may find the email confusing or irrelevant because they lack the background needed to understand its importance.
Solution:
When forwarding, add a brief explanatory note on why you're sharing it and how it relates to the recipient. This context improves communication and ensures the recipient grasps the email's relevance.
4. Misusing "Reply All"
Users sometimes mistakenly use "Reply All" instead of "Forward" - sending the email back to the original sender and all recipients rather than to a new intended recipient. This fails to properly forward the message while also flooding others' inboxes unnecessarily.
Solution:
Carefully select the "Forward" option instead of "Reply" or "Reply All" when intending to share the message with someone not originally involved. This sends it only to the correct new recipient.
5. Overlooking Forwarding Settings
Those who set up automatic forwarding may forget to review or update their settings, resulting in emails being forwarded to outdated or unintended addresses. This oversight can lead to missed communications or privacy breaches.
Solution:
Periodically review your automatic forwarding settings in Gmail. Ensure forwarding addresses are current and relevant, and adjust filters as needed to match your evolving email management needs.
6. Not Utilizing Filters Effectively
Gmail's filtering capabilities allow you to automate forwarding based on specific criteria. However, failing to set up filters properly can mean important emails are not forwarded as intended. Users may struggle to define the right filtering criteria, leading to over-filtering or under-filtering messages.
Solution:
Take time to understand Gmail's filter settings. Clearly define the criteria for emails that should be forwarded automatically to ensure the right messages are being redirected without missing critical communications.
The Bottom Line
Forwarding emails in Gmail is a straightforward process that enables you to share vital information and foster collaboration efficiently. By leveraging the step-by-step guide on how to forward an email in Gmail, users can seamlessly navigate through Gmail and forward messages to one or more recipients with ease. This feature not only ensures that pertinent details reach the necessary parties but also enhances productivity by facilitating effective communication.
Gmail's user-friendly interface and the simplicity of its forwarding functionality make it accessible to users across all skill levels, ensuring that anyone can take advantage of this essential tool. Before forwarding an email, remember to meticulously review its contents and make any necessary adjustments or add contextual comments. This attention to detail will enhance the clarity and relevance of the information being shared, fostering better understanding among recipients.
Frequently Asked Questions
1. How do I set up automatic email forwarding in Gmail?
To set up automatic email forwarding in Gmail:
- Go to Settings > Forwarding and POP/IMAP.
- In the "Forwarding" section, click "Add a forwarding address" and enter the email address you want to forward messages to.
- Follow the verification steps, then select "Forward a copy of incoming mail to" the address you added.
2. Can I forward emails with attachments in Gmail?
Yes, when you forward an email in Gmail, any attachments included in the original message will automatically be forwarded along with the email. You don't need to attach the files again manually.
3. How do I forward an entire email conversation or thread?
To forward an entire email conversation or thread, open the conversation, click the three-dot menu icon in the top right corner, and select "Forward all." This will include all the messages in the conversation thread in the forwarded email.
4. How do I add a personal message when forwarding an email in Gmail?
When you click the "Forward" button in Gmail, a new compose window will open with the original email included. You can add your message or comments in the body of this new email before sending it to the recipient.
5. Can filters be created to forward specific emails in Gmail automatically?
Yes, you can create filters in Gmail to automatically forward emails that match certain criteria, such as emails from particular senders or with specific words in the subject line. To create a filter, click the search bar in Gmail, enter your criteria, then click "Create filter" and check the "Forward it to" option.
Get Business Email
No domain name required