


.svg)
.svg)


Get Business Email
No domain name required

Email automation is one of the most effective strategies for email marketing. Have you ever wanted to send an email at the right time so it will be the first thing your leads or clients see? Outlook’s email scheduler makes this possible, enabling you to automate your communication workflow. An email scheduler allows you to compose your emails beforehand and queue them to be sent at any time you want.
Whether you want to follow up with a prospect or craft a strategic message, Outlook’s email scheduler can help. It is similar to Gmail recurring emails but with more advanced features and tools.
In this blog, you will learn how to send automated emails using Outlook to improve your workflow, drive customer engagement, and get the most value out of your email marketing campaigns. We will also give you a step-by-step guide on how to set up the Outlook email scheduler in a few easy steps. Are you excited to know more? Keep reading to learn more!
What is Email Scheduling in Outlook?
The email scheduler in Microsoft Outlook is a convenient feature that allows users to draft an email and set it to be sent automatically at a specified date and time. This is incredibly beneficial for ensuring emails are sent at optimal times, planning ahead for important communications, and meeting deadlines or event schedules. It also helps you streamline your email management process.
It can also enhance email marketing strategies by timing messages to reach recipients when they're most likely to engage with them. This feature is available in both Outlook desktop clients and in Outlook web apps, so it is universally helpful. However, it needs an active internet connection to send emails at the customized schedule.
How to Use Email Scheduler to Send Automated Emails in Old Outlook?
Outlook is one of the most popular email clients, with over 500 million active users and accounting for 4.04% of all email platforms. It provides robust email automation features that can help you save your resources and get a high ROI on your marketing campaigns. Here is a step-by-step approach to how you can send automated emails using Old Outlook.
Step 1: Login To Your Account
The first step is to log in to your Outlook account and navigate to your email homepage. From here, you can compose your email as you would normally do.
Step 2: Define Your Email Schedule
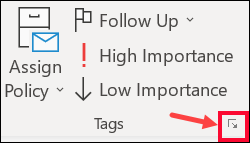
Once your email is ready to send, you will need to decide when exactly it will be delivered to the recipient's inboxes. To add a schedule, navigate to the Tags option in the ribbon bar and click on More Options (a box with an arrow).
Step 3: Configure The Delivery Settings
It will take you to the Delivery Options page. From here, you can check the Do not deliver before box and then configure the time and date you want the email to be sent.

Note: Some accounts may not have the tags option. In that case, you can navigate to the Options and then select Delay Delivery. This will take you to the delivery settings page from where you can adjust the email schedule.
How to Use Email Scheduler to Send Automated Emails in New Outlook?
The new Outlook email scheduler is infinitely more straightforward. Here are step-by-step instructions on how to use the email scheduler to schedule and send emails in the new Outlook:
Outlook Scheduling for Desktop
Step 1: Start a New Email
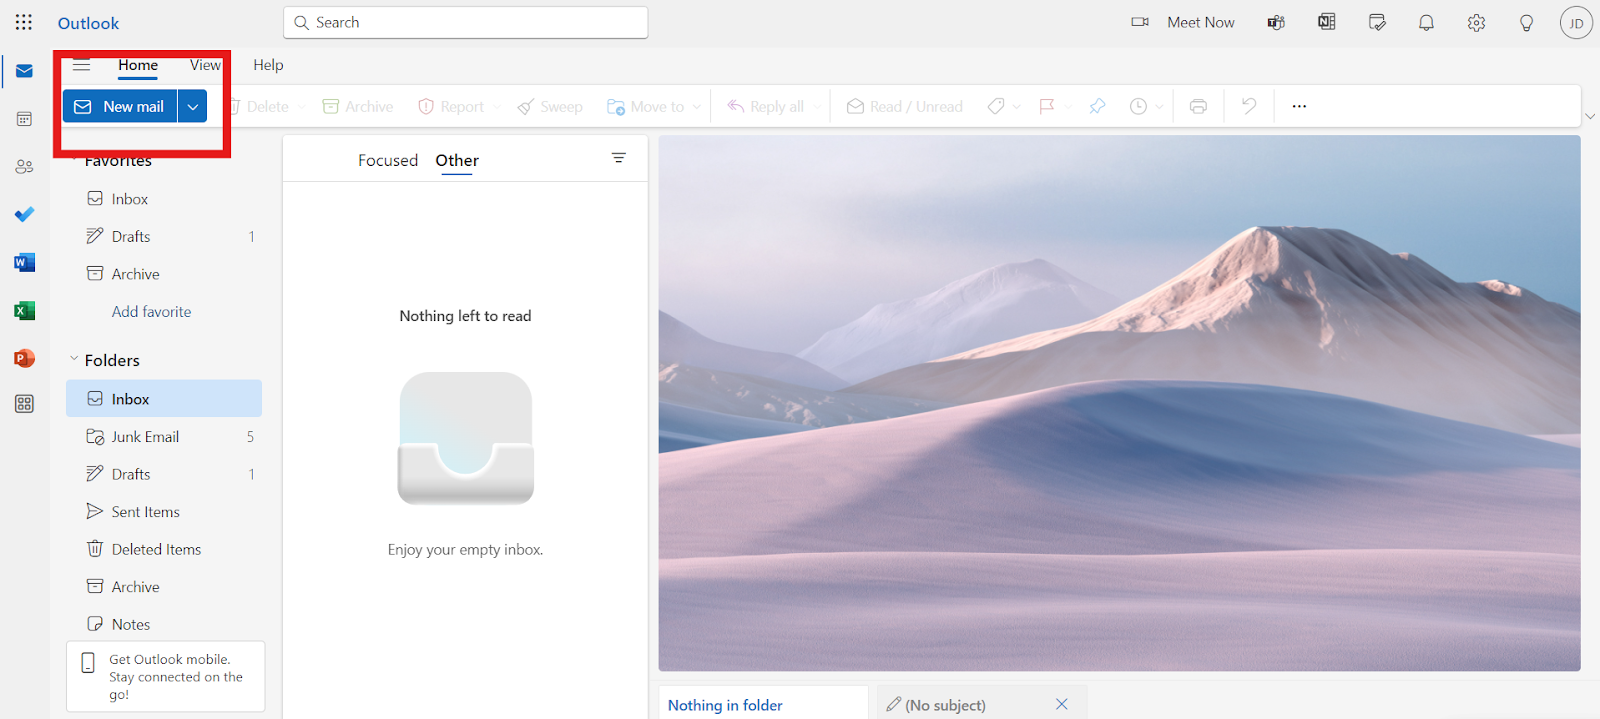
Firstly, just like in the Old Outlook method, log in to your account. When you are on the main screen of Outlook, look for the big blue icon in the top left-hand corner that says “New Mail”.
Step 2: Compose Your Email
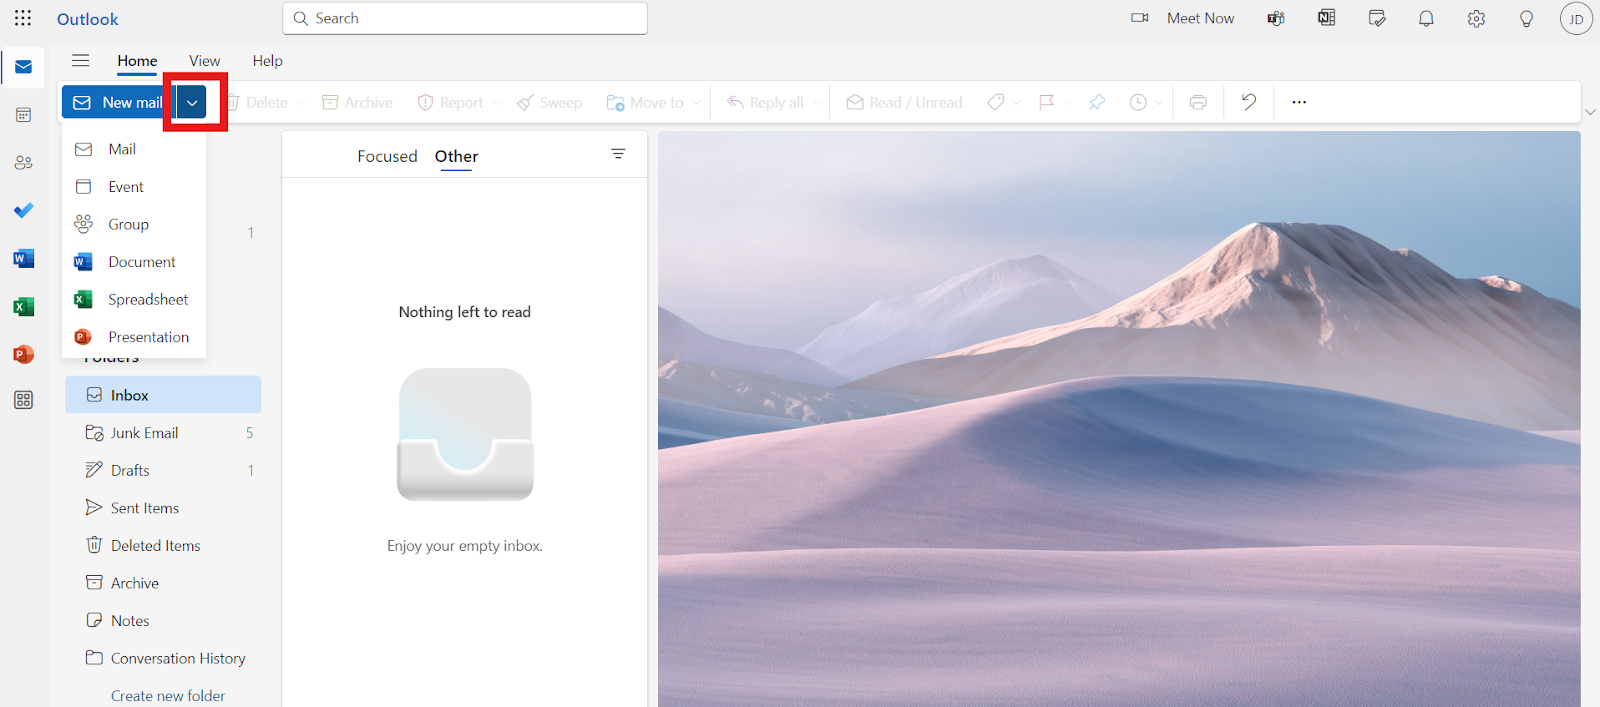
A drop-down list will be seen on the screen. Press the “New Mail” button and begin composing the new email by entering the recipient’s email address, the subject, the body of the message, and the signature line. It is important to take time and avoid hitting the send button right away. However, look at the tiny arrow icon that is placed beside the send icon.
Step 3: Select Schedule Send
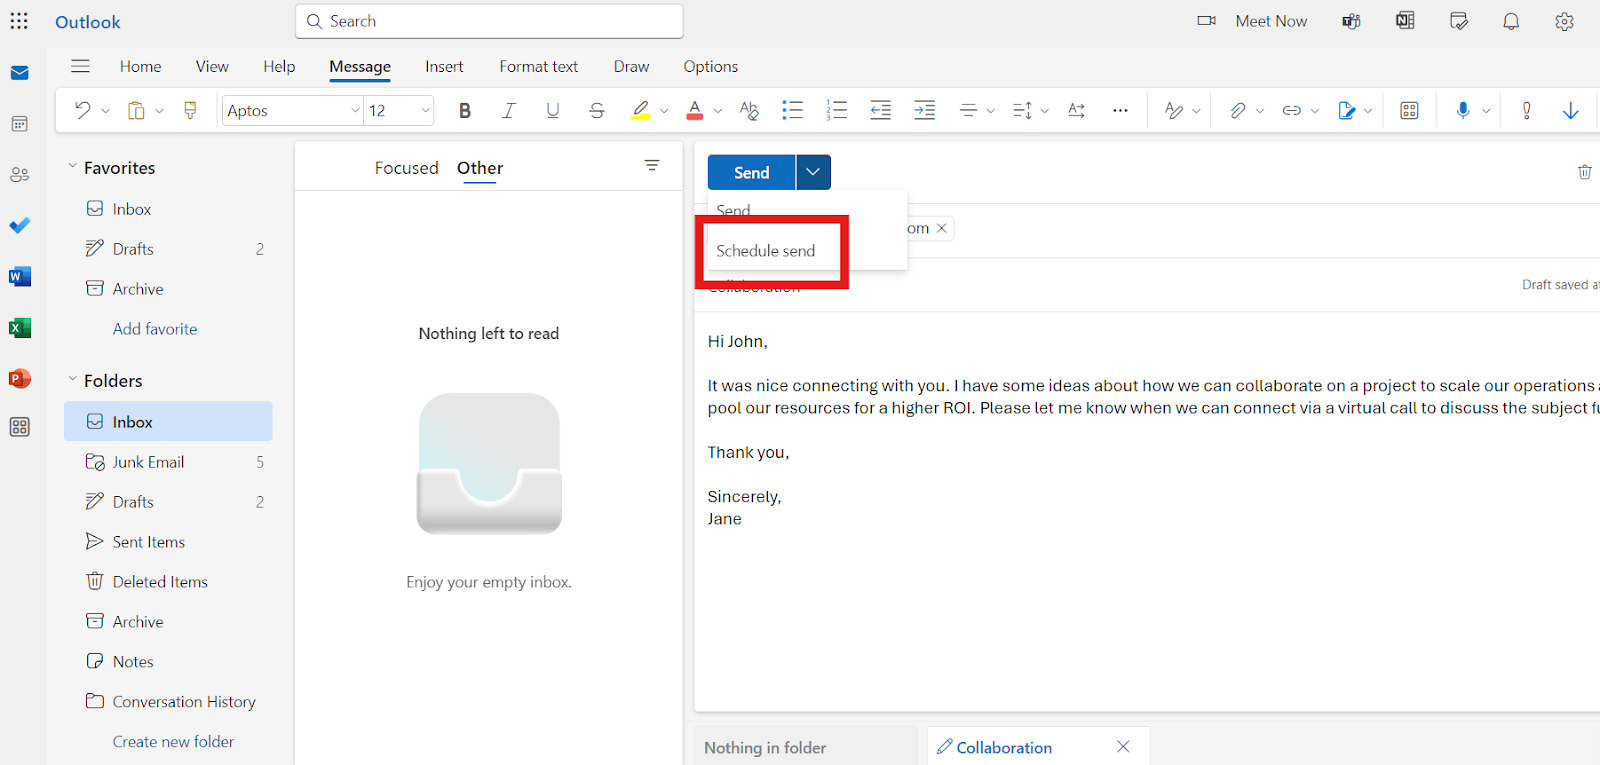
Click on the drop-down arrow next to the Send button to expand the “Schedule Send” tab. This will take you to a new screen where you need to set the date and time that you want the particular email to be sent in the future.
Step 4: Set Date and Time
Once you click on the Schedule Send button, it will take you to a pre-set time and date pop-up page. You can either choose and click send or click on the customize option.
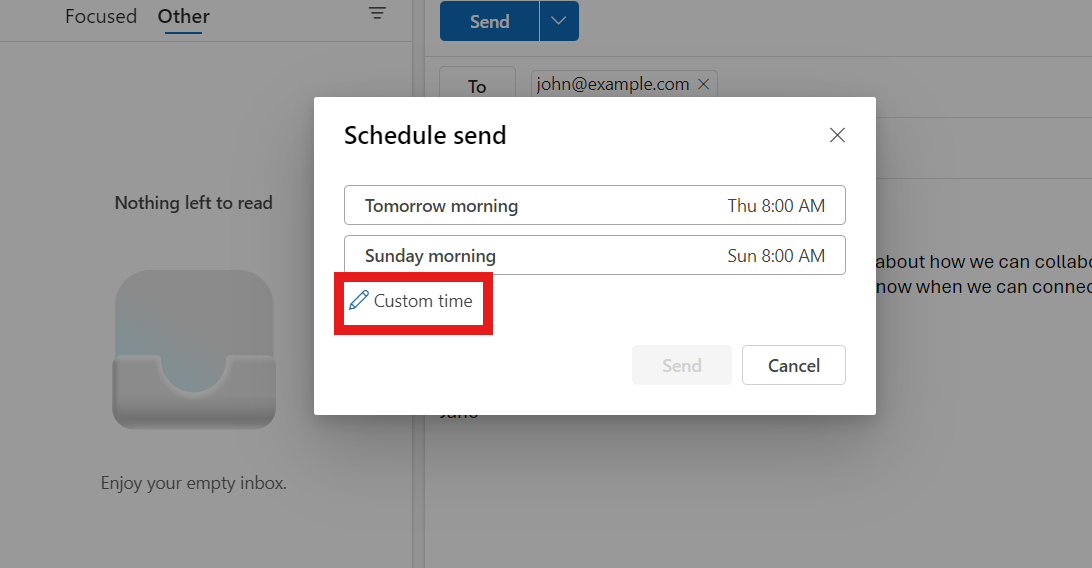
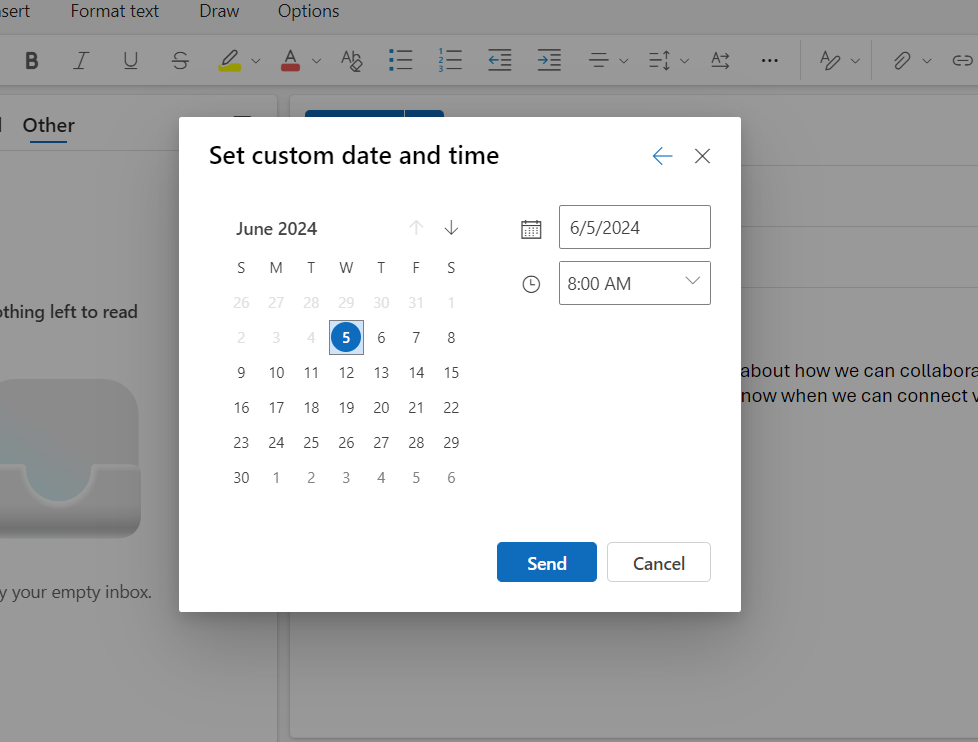
Step 5: Customize Your Delivery Schedule
You will get a calendar and timing option. Choose the date and time of your email delivery based on your preferences. Then, click Send. The email will remain queued for delivery in your outbox until the specified time and date.
Try Neo’s Send Later: The Perfect Alternative To Outlook

Neo is a robust email hosting platform with rich features to make your email marketing endeavors more successful. It also lets you make a professional email ID to streamline your communication and increase your brand awareness. It also provides email tracking tools, generative AI to compose email messages quickly, and email campaign management.
Given the speed of today’s world and the need for quick decision-making, the timing of your emails cannot be overestimated. From personal communication with customers in different time zones to avoiding delays in replies, scheduling your emails can go a long way. Neo’s Send Later feature can help you make the most of your emails.
Why Choose Neo's Send Later?
Neo’s send later option makes it easier to schedule messages for business proposals, birthday greetings, and promotions. It supports web, Android, and iOS interfaces to ensure a unified interface for managing your emails and guarantee the security and deliverability of the sent messages. Whether you are using Neo while walking around or working in an office, your messages will be delivered on time.
How to Schedule Emails with Neo's Send Later?
Here’s how to schedule emails with Neo’s send later feature:
For Webmail Users
Step 1. Compose Your Email.
Create the layout of the email as you would normally, or use an email template. When this is done, you will find the setting that can be selected to ‘Schedule Send’.

Step 2. Pick a Date and Time.
You can select one of the date and time options provided on the right or select a custom date and time from the calendar available within the drop-down list.
Step 3. Schedule Send.
Once you have set the date and time, click on the ‘Schedule Send’ button.
For Android Users
Step 1. Compose Your Email
Start composing your email and then navigate to the top right corner, where you will find the ‘Send’ button. Click on the three vertical dots beside it.

Step 2. Schedule Send
Click ‘Schedule Send’ and use the drop-down menu to set the date and time of the message you want to send.

Step 3. Confirm and Schedule
Ensure the time is accurate and click the ‘Schedule Send’ button.
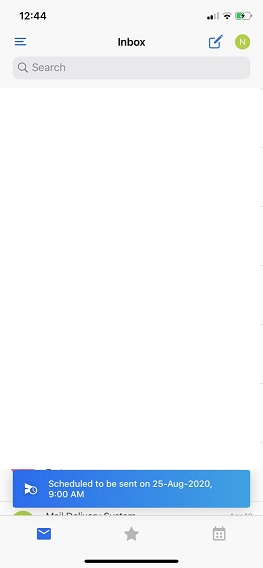
For iOS Users
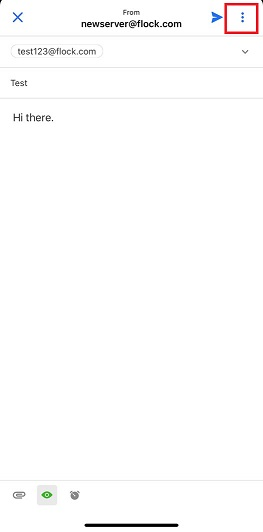
Step 1. Compose Your Email.
Type your email and click on the three vertical points near the ‘Send’ button.
Step 2. Schedule Send.
Click the “send” option in the toolbar and select the “schedule send” option.

Step 3. Select the Date and Time.
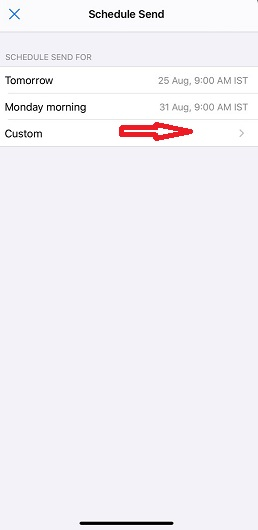
A new page will open, enabling you to set your preferred date and time in a calendar. In the final stage, click on the button labeled ‘Schedule Send. ’
You can even edit and delete scheduled emails before their delivery. All you have to do is click on the scheduled email folder, search for the desired email, and see two options: Edit and Delete. If you wish to edit the email, click the first button; if you want to delete it, click the second button.
Outlook vs. Neo: Comparison and Ratings
Neo and Outlook both offer seamless and easy-to-use email schedulers. So, which platform should you choose to streamline your email communications? Let’s compare both options to help you pick the best scheduler. We will also rate both email providers based on their usability, functionality, ease of use, and features.
Conclusion
Outlook’s email scheduler helps professionals ensure that their emails are delivered at the optimum time and read by their leads, which, in turn, will increase the level of interaction and efficiency. It also assists you in organizing your workflow, helping you stay on track with your tasks, and remembering important dates and check-ups. Use this feature to handle your emails proactively and increase your productivity.
Neo’s Send Later is also worth using for further customization and options in your operations. It also helps enhance your click-through and email open rates by allowing for scheduling and automating your emails and managing it all under a single interface for the web, Android, and iOS.
Using Neo, you never need to worry about the timing of your messages again, as everything is done to perfection. Explore the Send Later feature to elevate your email strategy. Register with Neo and enjoy a free trial today!
Frequently Asked Questions (FAQs)
Q1. How do I schedule an email in Outlook?
To schedule an email in Outlook, open Outlook, type the content of your desired email message, click the “Send” tab, and select the “Send Later” button. Provide the date and time of the email. The email is stored in the Outbox folder and will be sent out at the required time as long as Outlook is open and connected to the Internet.
Q2. Can I edit or cancel a scheduled email in Outlook?
Yes, if you have scheduled an email and later wish to edit or cancel it, you can do so in the Outbox folder. Open the email, and if there are changes to be made, edit it or set a new date for the appointment, resend it, or delete the email if the appointment was canceled.
Q3. What are the benefits of using email scheduling?
An email scheduler helps coordinate with clients and leads worldwide, monitors communication regularly, increase employees' efficiency, and help in marketing by scheduling emails that engage recipients.
Get Business Email
No domain name required