


.svg)
.svg)


Get Business Email
No domain name required
Need Email for Your Domain?
Try Neo

Are you someone who is searching for ‘email hosting for my domain’ on the search engines? That means you already have a domain but are struggling to find the right platform to start your email hosting services. Well, you have landed in the right place!
We understand that finding the one correct email hosting service provider can be difficult with so many options available online. The most confusing part, each one offers similar features and yet is different from the others. So, while it is important to explore all the email hosting platforms for their features and services, it is equally critical to know that they align with your business needs of hosting an email on your existing domain. This guide will take you through the top 4 ways to start email hosting with your domain.
Short Overview: Top Providers for Email Hosting For My Domain
Your search ends here! Have a look at the top four email hosting providers that offer services for your existing or a new domain. You can explore their details in the later sections of this guide:
- Google Workspace: Offers email hosting with an existing domain or the purchase of a new one. Get enterprise-grade security, reliability, and integration with Google Docs, Sheets, Drive, Calendar, and productivity tools. A 14-day free trial with email plans.
- Neo: Start email hosting with your already existing domain, or create one with Neo (offers a free .co.site domain). Create multiple email addresses at affordable plans with advanced features and a free one-page website using AI. A 15-day free trial with each email plan.
- Zoho Mail: Use your registered domain or buy a new one with Zoho. Offers seamless integration and collaboration with Zoho CRM, Calendar, and a forever-free plan with limited capabilities.
- Proton Mail: Secured email hosting with only the existing domain. Swiss-based data-privacy and security features, from end-to-end encryption to self-destructing emails. A ‘Proton Free’ plan for only one email address.
What is Email Hosting for My Domain?
Email hosting on your domain is a service where a company leases you space on their servers to send, receive, and store email under your custom domain, such as your name@yourbusiness.com. This provides you with professionally appearing email addresses associated with your brand as opposed to free services like @gmail.com and offers reliable, secure, and feature-packed email management to your business.
In brief, rather than the email provider giving a generic name to the email (such as johns@gmail.com), you have the option to have a professional email with a custom domain (such as johns@yourcompany.com), which can be much more credible and authoritative.
How Do You Get Your Own Custom Domain?
In case you do not have your own custom domain, you can also buy a professional domain to get started with free email hosting. It is a fairly easy process. Here are the steps:
1. Select a Domain Registrar.
First, select an accredited domain registrar from which to purchase your domain. There are many reputable registrars available around the world (accredited by ICANN, the Internet Corporation for Assigned Names and Numbers).
2. Choose your Domain Name.
After navigating to the registrar's website, use their domain search tool to determine if the domain name you want to use is available. Enter the name (and your selected top-level domain .com, .org, .net, and others) and see if it is available, or if it is already taken. If it is available, you are free to proceed. You can also take the help of AI domain name generators if you are running out of ideas.
3. Configure the Settings.
Click on add domain name option. Choose the term of registration of your domain (you can usually register 1- 10 years). With some registrars, it is optional to purchase web/email hosting along with domain name.
4. Enter your Personal Details.
During the registration of a domain, you will have to submit the contact information of the domain registrant (owner), which includes name, email address, address, and phone number.
5. Purchase the Domain Name.
Proceed to checkout. Check your order summary to make sure that it contains the domain only (and privacy protection in case it is necessary). Once paid, you will get a confirmation e-mail, and the domain will be registered officially under your name.
4 Ways to get a Professional Email Hosting on My Domain
To get professional email hosting for your custom domain, you need to select a reliable email hosting provider. Otherwise, if you go to setup your in-house email hosting servers, it will cost a lot.
That’s why, we have mentioned the top 4 email hosting providers where you can get email hosting for your own domain name:
1. Google Workspace
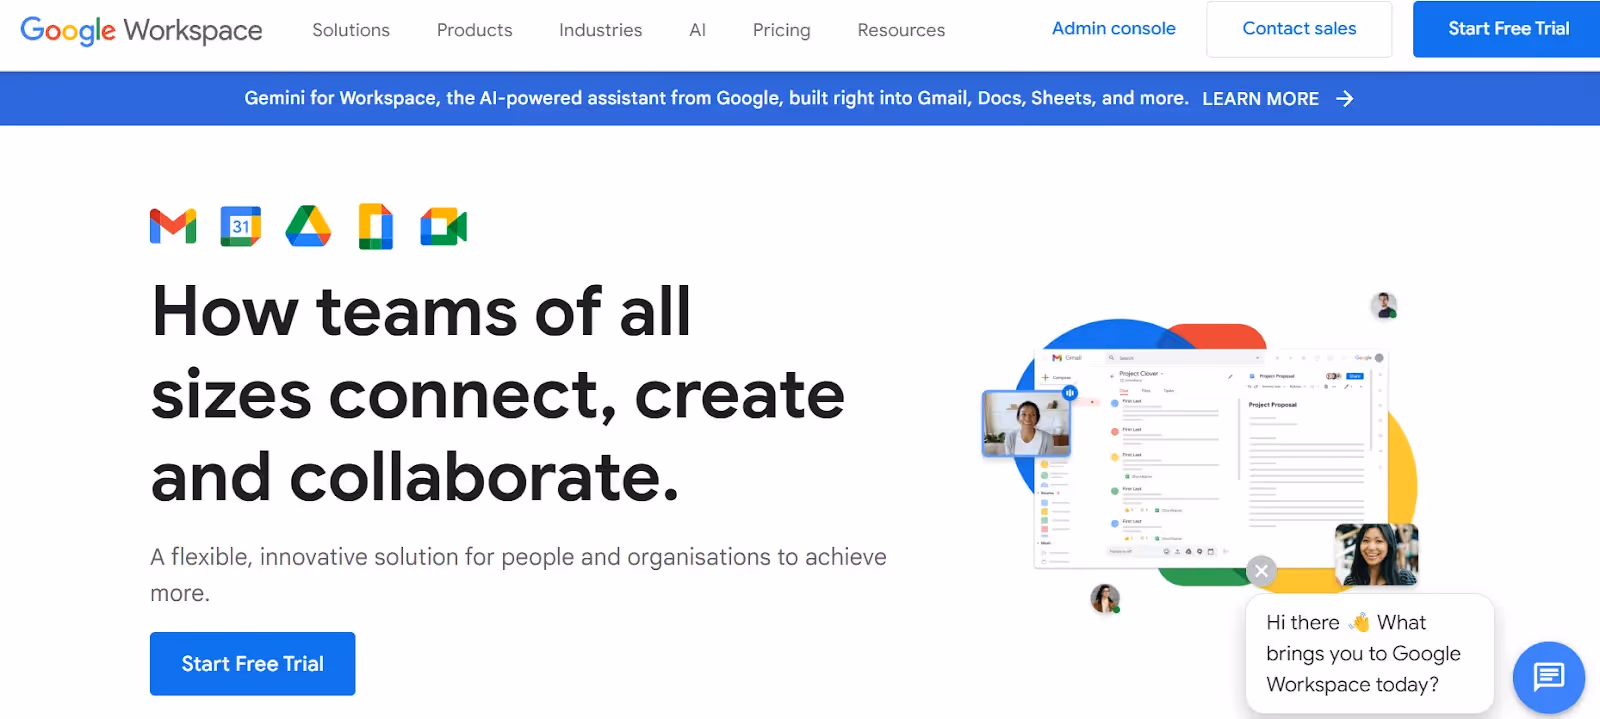
Google Workspace is a great option for free email hosting for a custom domain of your own. It works like Gmail, but for your custom domain, which makes it most reliable and professional. It operates on both Android and iOS, so you will have all services covered, no matter which platform you use.
Features
- Based on your plan, each user has anywhere from 30GB to unlimited storage in the cloud for email and file storage.
- Google Docs and Sheets let you collaborate live with your team on the same document.
- It helps you create a business email address using your own domain, like “yourname@yourcompany.com.” You can further create multiple email addresses or aliases for your brand with the same domain.
- Strong security features like two-factor authentication, a zero-trust approach, encryption, protection from phishing, spam, and malware, along with user management to keep your company’s information secure.
- Includes AI smart features like grammar suggestion, nudges, AI content creation, automatic replies, etc.
How to Get Email Hosting for My Domain with Google Workspace?
Here’s how you can get email hosting on your custom domain through Google Workspace:
Step 1: Complete the Google Workspace setup wizard
- Visit the Google Workspace website and choose a plan. You can start with a free trial or choose a plan. The basic plan starts at $6 per user per month, which includes 30 GB of storage.
- Next, you will be prompted to enter your company name, size, and country. After this, you will enter your contact information and click 'Next'. This will take you to the domain selection screen.
- Since you already have a domain, click on "Yes, I have one I can use" and continue from there.
- The next step is to enter your existing domain. Click 'Next', and you will see a message asking for confirmation. Again, click ‘Next’ to continue after confirming the domain name.
- Now, you need to enter your company information and payment information to finalize the sign-up process.
- Once you have finished signing up, you will see a confirmation page. Now move to setup.
Step 2: Domain verification
- You will see a verification page. Click on the Verify button.
- Add a TXT record to your domain name, which means you will have to log in to your domain name registrar. Click on Continue.
- Search for your domain name registrar instructions here, or contact your domain name registrar for further assistance adding your TXT record if you do not see your specific registrar.
- When the TXT record has been added to your domain name records, go back to this verification page and click on Verify My Domain.
Step 3: Adding other users (optional)
- Once you've verified your domain name, you can create additional email addresses with the same domain for other members of the team or departments.
- If you only need one user, you can skip and jump to Step 4 below. Otherwise, click Create, then Continue, then Add Another User.
- When you’ve added all of the users you need, click Continue.
Step 4: Add MX records to your domain name
- Lastly, we need to update the domain name settings with an MX record.
- If you’re signing up, you’ll only need to add one MX Record in the DNS settings of your domain (the same for your new email address):
- After you’ve updated your domain MX records, return to the Google Workspace sign-up page and click Activate Gmail.
Now that you have completed the setup, you can access the Google Workspace Admin Console with your 14-day free trial. Remember to add billing details so that you don’t experience any interruption in service.
Read More: Google Workspace Alternatives
2. Neo
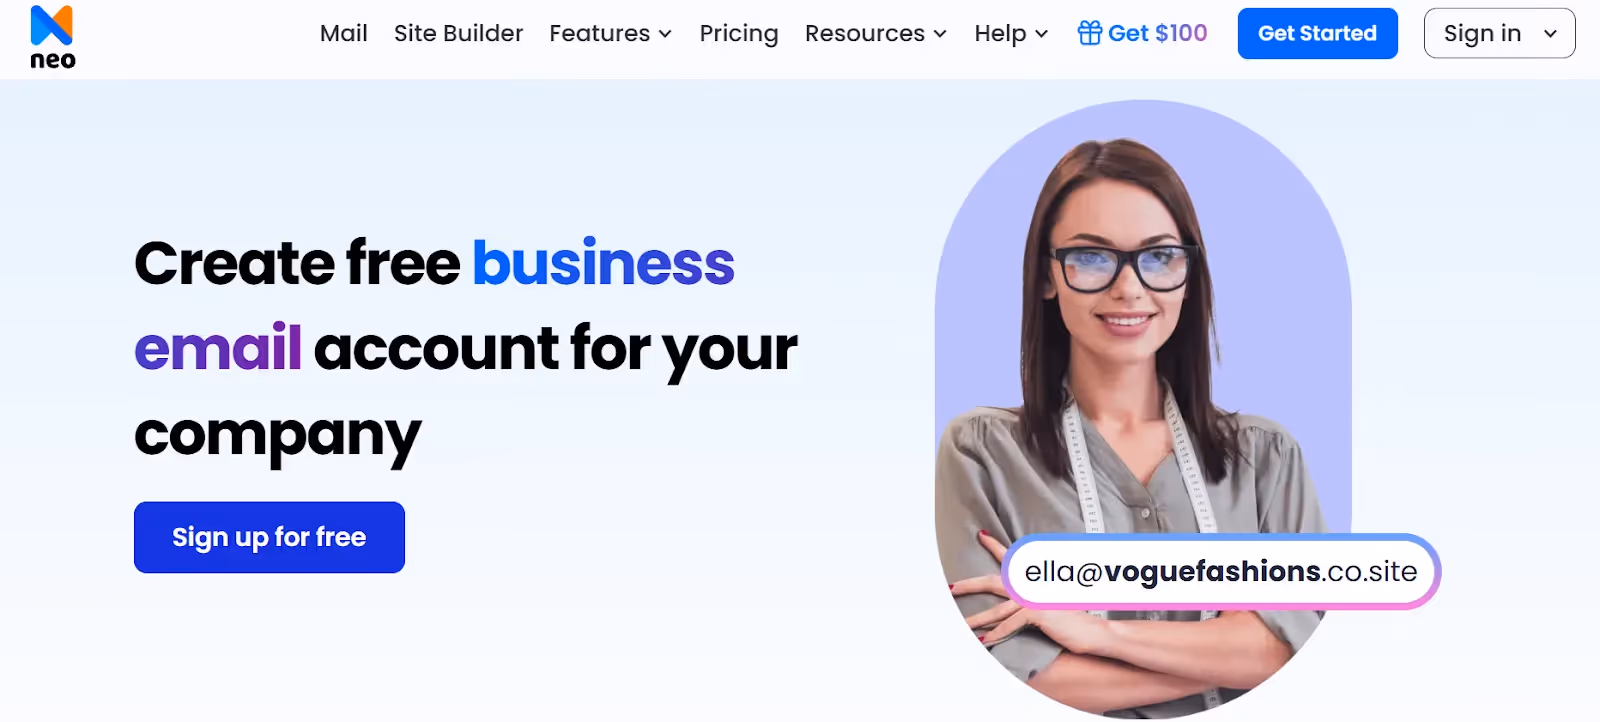
Neo is an easy-to-set-up option if you're looking for free email hosting for your custom domain. With Neo, you can connect an email account to your existing domain or take advantage of a new .co.site web domain that has a global presence. The platform is secure and intuitive, with a strong emphasis on data protection. They also provide excellent customer support, AI website builder, mobile device accessibility, and a free trial for 15 days.
Features
- Allows using your own domain for email hosting or a complimentary (.co.site) domain if you don’t want to use your own domain.
- Email management features, such as email tracking, priority inbox, email rules, calendar, appoints, and bookings.
- Users can create and add multiple email addresses using the same domain name.
- AI-powered features like AI smart write, AI website builder, site analytics, customizable themed, and lead generation.
- A free one-page website with each email plan.
- A Neo growth suite to monitor and track the progress of your email campaigns. Signature designer to give a more professional look to your emails, and customizable email templates.
How to Get Email Hosting for My Domain with Neo?
You can set up your custom email address with Neo at affordable pricing, even if you already have a domain registered with an external registrar.
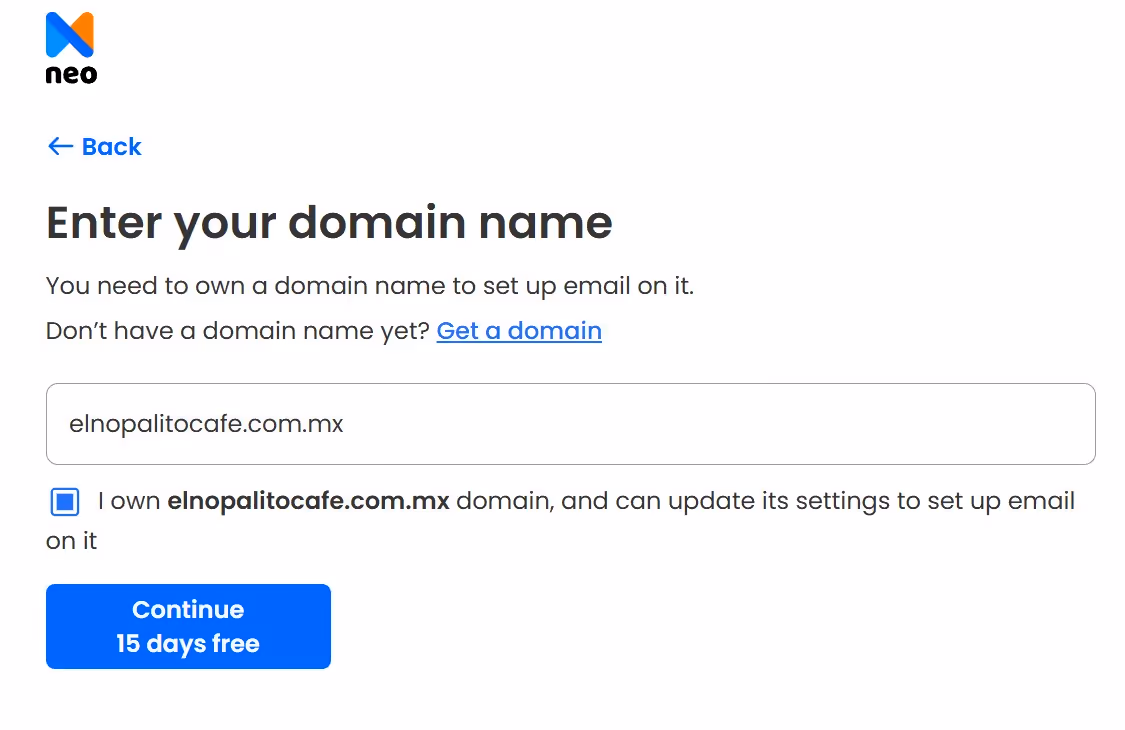
Step 1: Sign up and add your Domain
- Open Neo's official website and select the Get Started option to create your business email address.
- Choose the option Yes, I have a domain I can use. Then, click the 'Continue with my domain' button.
- Enter your domain that you own through a domain registrar, click on the tickbox, and tap Continue. Neo will quickly verify that you own that domain.
Step 2: Create your customer account
- Register with Neo to manage your Neo email account, plans, and billing.
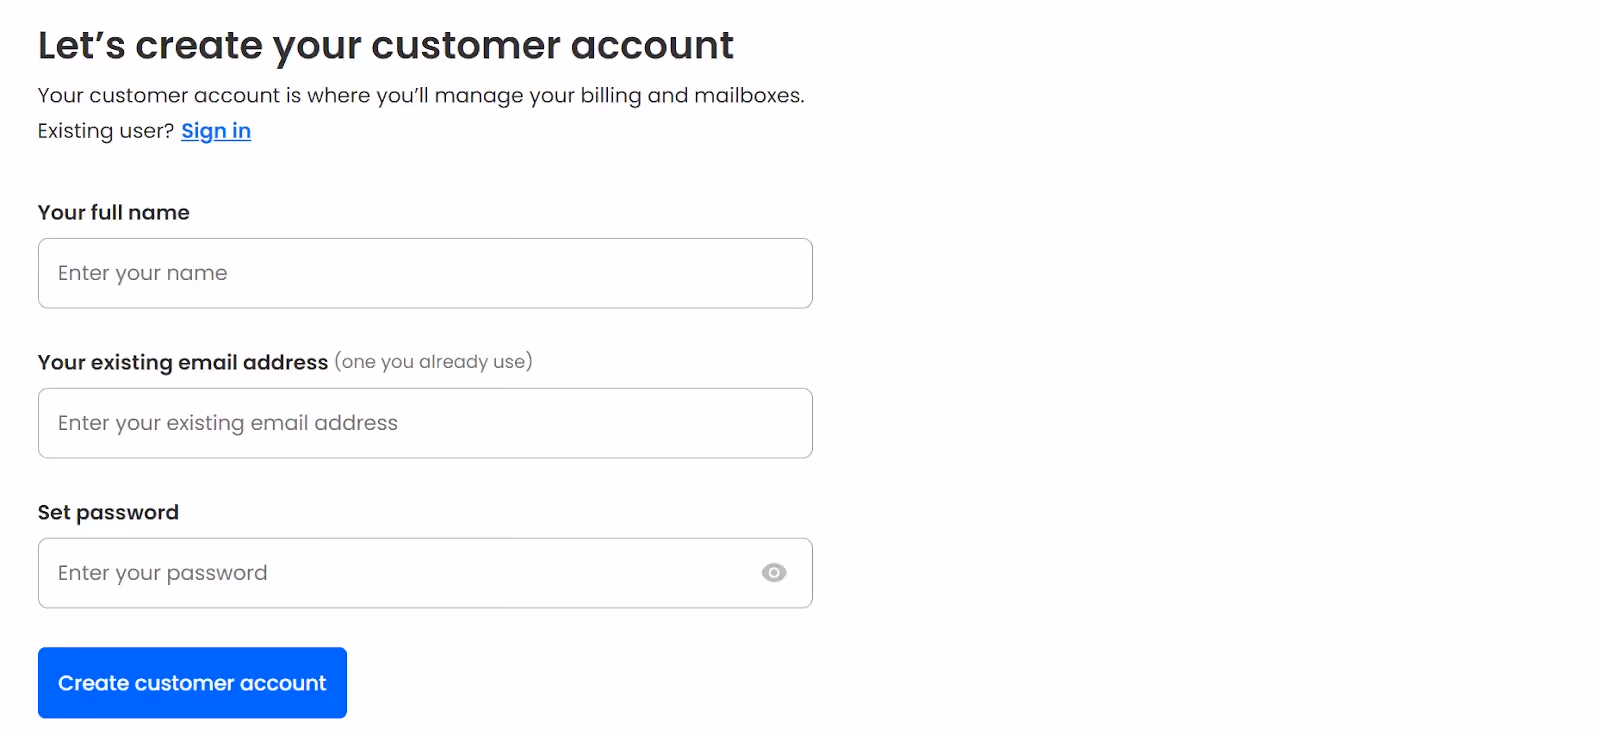
- Now, create your email address with your existing domain. You will be able to use this address for free for 15 days.
Next, to allow emails to flow in and out through Neo’s server, you must configure the DNS settings:
Step 3: Log in to the admin panel and update DNS settings.
- Log in to your account on the domain registrar's site and navigate to the to find the DNS/Domain Management Page/ DNS Control Panel.
- Head to MX Records, Email Servers, or Email Settings. Here, you can add or replace the following MX records for your domain:
- Repeat the above steps for all entries in the DNS panel.
That’s it! You can send and receive emails from your domain with Neo Mail.
3. Zoho Mail
Zoho Mail is a popular platform for email hosting with an existing domain for small to medium-scale businesses. Even if you don’t have a domain, you can buy one through the platform. With its seamless integration with all Zoho apps in the ecosystem, ad-free services, and easy user management, it is one of the best ways to start email hosting.
Features
- Customized email address creation using an existing or a new domain. Allows the addition of multiple email addresses for other users.
- Secured email services with encryption both in rest and transit. Also offers 99.9% uptime.
- Powerful admin console to manage settings, configurations, group aliases, and customizations.
- Email retention for a given period and e-discovery for retained emails.
- Accessibility with mobile applications: Native, Streams, and Mail Admin.
- Integration with Zoho CRM. Easy migration and built-in calendar.
- Ad-free emails and security features such as spam filtering, virus detection, and encryption.
How to Get Email Hosting for My Domain with Zoho Mail?
Here is how to set up your custom domain email with Zoho Mail.
Step 1. Setting up Zoho Mail with the existing custom domain email.
- Open Zoho’s pricing page and select a plan. Next, you need to create an account. Enter your name, existing email address/ phone number and set a password. Accept the terms and conditions and click on Sign up.
- To add your existing domain, click on ‘Add now’. You can also buy a new domain if you don’t have one.
- Enter the domain details and click on ‘Add’.
- Your domain has been successfully added. Now, you need to proceed to the domain verification steps.
If you don't have an existing domain name, then you can consider Zoho Mail alternative if you want a domain name for free.
Step 2: Domain verification
Zoho verifies your domain for its ownership using two techniques: one-click verification or manual verification.
For one-click verification (Currently available only for GoDaddy and 1&1 domain providers):
- Sign in to your DNS provider.
- Authenticate this provider with Zoho Mail and add the DNS records.
For manual verification (For all domain providers other than GoDaddy and 1&1):
- A CNAME method that uses a code to be added to your DNS manager. Users then need to follow the instructions, click on VERIFY CNAME in the Admin console.
- With a TXT Method, users need to copy the TXT code from the admin console, add it to the TXT record, then VERIFY TXT in the Admin console.
- Using the HTML method, the users need to upload the HTML file to the ‘zohoverify’ folder and then click ‘VERIFY’ to complete the process.
Step 3: Admin email address creation and user addition.
- Finally, you can create your super administrator email address.
- Next, click on ‘Add’ on the ‘Users’ page to add other users of your organization.
Step 4: Configuring MX records and DNS settings
- Open the DNS manager of your DNS provider.
- Eliminate the existing entries in the MX record and click ‘Add record’.
- Copy the MX records data from DNS mapping to your domain’s DNS manager page. Next click, ‘Add record’.
- Then, add TXT records, SPF value, and click ‘Add record’.
- Enter the KIM host value, then click ‘Verify all records’ on the DNS mapping page.
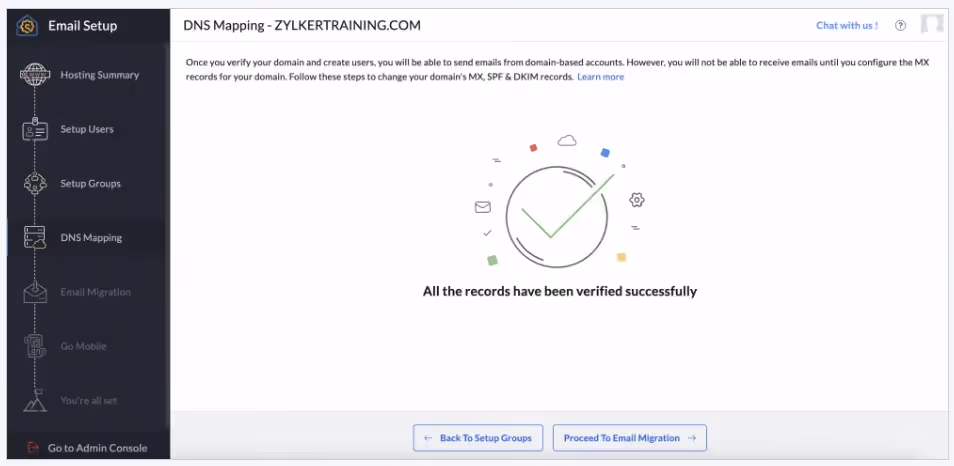
That’s all. You are now ready to start email hosting on Zoho Mail.
Read More: Zoho Mail vs. Google Workspace: Which is Better?
4. ProtonMail
ProtonMail is an email provider designed with privacy as a primary consideration. It uses Swiss-based data privacy techniques, end-to-end encryption, and advanced spam protection and filtering to ensure your data is secured throughout the platform..
Features
- Email hosting services with an existing domain. Allows creating catch-all email and aliases.
- Self-destructing emails, Switzerland -protected data privacy, end-to-end encryption, and compliance with GDPR and HIPAA.
- There are no ads, even as a free user.
- Allows easy migration and seamless built-in capabilities like calendar, email imports, contacts, and labels.
- Additional email management features like hide my emails and hide-snooze emails, etc.
- Accessibility across desktops and mobile devices.
How to Get Email Hosting for My Domain with ProtonMail?
Steps to get an email host for your custom domain through ProtonMail are as follows:
Step 1: Sign up for Proton Mail
- Head over to the ProtonMail sign-up page, choose a username and password, and confirm the password. Then, you can click on the Create account button.
- Verification will be requested; you can verify either with Captcha or email.
- It will ask you to set up the display name. It will show the default username as the display name. However, you can change it if you want and click Next.
- It will prompt you to establish a recovery method. You can establish it now or click on the Maybe later button.
- Your ProtonMail account has been created. Click on the Next button.
Step 2: Open ProtonMail settings
- After registering your ProtonMail inbox, go to the menu by clicking on the Settings button. Click Go to settings to go to the advanced account options.
- To open the domain menu, select Domain name on the left sidebar. Click the Add domain option and enter the domain name that you have just bought for ProtonMail.
- Click on next to verify the address. After that, you will be requested to enter your password in ProtonMail.
Step 3: Confirm ownership
- You are now required to check your domain ownership and add your DNS records. (DMARC, SPF, or DKIM authentication can also be added optionally)
Note: You will have to enter DNS records to your DNS provider or domain registrar.
- In the Aliases section, you will find the status of verification of your domains. To view the DNS status of a domain, choose the three-dot ⋯ icon. Mostly, it may require several hours to update DNS records.
Step 4: Create MX records for ProtonMail
After verification of the address, it is also necessary to add the following two MX Records to the DNS settings to be able to receive emails in ProtonMail under your own domain:
Step 5: Add address or inbox
- The final thing to do is to add your ProtonMail inbox to your custom domain. To do this, select the final tab of the setup wizard, which is the Addresses, and then press the Add address.
- Go to the next menu and under the ‘My Email Addresses’, again, click on Add address. Choose a custom domain in the Address. Enter the name before the domain and select a display name for the inbox.
- The new address is now to be listed. To finish connecting your ProtonMail with your own domain, make sure to click on the Set as default button so that you can make it the new main inbox of your ProtonMail account.
Read More: ProtonMail vs Gmail: A Comprehensive Comparison
The Bottom Line
Choosing a reputable business email service, particularly one that allows you to flaunt your own domain, is not simply about sending emails; it's about placing a mark of your brand and professionalism on every communication you send. So sit back, think about your requirements, and don't forget, it's not simply about today, but it's about where you want your business to be in the future.
FAQs
1. What are some of the best options for email hosting for my domain?
Although there are plenty of options to start email hosting, which vary depending on budget, feature requirements and services offered. To quote some of the top platforms, Google Workspace, Neo, Zoho Mail, Proton, Mailfence, IONOS, etc, are quite popular for email hosting.
2. How to set MX records for email hosting for my domain?
MX records are used to direct emails to your mailbox. Here’s how you can set up MX records for your domain:
- Get the MX record for your provider.
- Now, add these MX records to the domain DNS management panel, also specifying the hostname and priority.
- Now save and allow DNS propagation.
3. How to set SPF records for email hosting for my domain?
Configuring SPF can minimize the chances of spoofing. Here’s how you can set SPF records. Create a TXT record in DNS, such as: v=spf1 include:spf.provider.com-all. Now, change the spf.provider to that of your email hosting provider.
4. How to set DKIM records for email hosting for my domain?
DKIM can provide authenticity for email signatures. Here’s how you can set it:
- You can gain a DKIM key with the hostname from your provider, such as default._domainkey.
- Now, add this record to DNS with the provided key and value.
5. Which platform do I use to start email hosting for my domain free?
While there are many platforms that offer a free domain for email hosting, Neo allows users to create a professional email address with a free (.co.site) domain extension with all its email plans.
6. Which provider can offer the best email hosting for my domain?
Google Workspace and Zoho Mail are the top providers if you prefer to work in their ecosystem and use all the platform-related apps and services. But if you are looking for a more affordable option that offers best-in-class email hosting services along with freebies and AI-driven capabilities, then Neo is the best email hosting provider.
7. Do email hosting providers allow you to use your own domain?
Yes, many email hosting providers like Neo, Google Workspace, and Zoho Mail allow users to create an email address using their already registered domain with any third-party platform.
8. What are some good domain name registrars for starting email hosting for my domain?
GoDaddy, Hostinger, Namecheap, and Neo are some of the top domain registrars for getting a domain for email hosting.
9. Which is the best domain registrar that includes an email?
Neo is one of the best domain registrars that offers domain services along with professional email and website hosting services.
10. How to get a business email if I have a domain?
Getting a business email with the domain you already registered is super easy:
- Select the email hosting provider according to your preferences.
- Enter the domain name you already have.
- The platform will verify its ownership. Once verified, you can use it to create a professional email address.
Get Business Email
No domain name required
Need Email for Your Domain?
Try Neo